Tissue paper flowers are as affordable and easy as they are festive. These are lovely at weddings in soft shades, but just imagine how fun they would be in bright holiday hues!
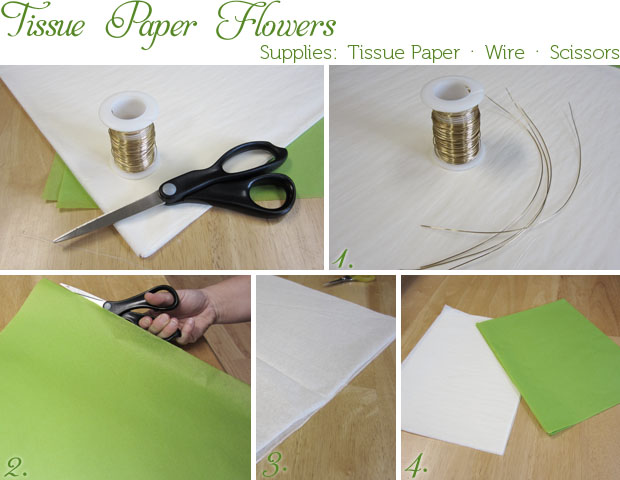
1. Cut pieces of wire to about 7 inches — this can vary depending on the size of your flower. You need enough to wrap around and twist, creating a stem of sorts, which you can use to attach to another (to create a whole pom) or any other item/surface.
2. Cut 2 pieces of tissue along the fold.
3. Fold in half again and repeat. The size of your cut tissue will determine the size of your flower (our flower will be about 5 inches). You might choose to leave the paper in larger sheets or continue to cut them smaller.
4. We’ve cut our tissue in half twice, giving us eight pieces to start folding with.
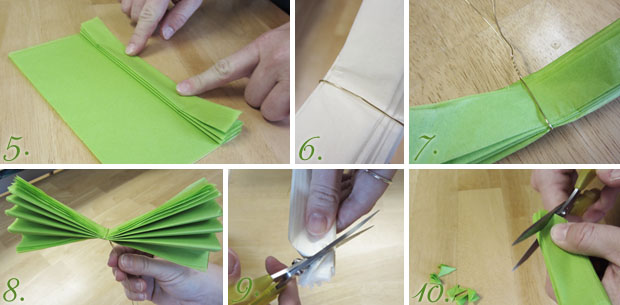
5. Begin folding your pieces of tissue accordion style from top to bottom.
6. Find the center of your folded tissue and wrap a piece of wire around the middle.
7. Twist the wire to secure it around the middle of your tissue accordion.
8. Like so!
9. Now trim your edges with sharp scissors.
10. You can cut round edges, pointy ones, or maybe get creative with other shapes.
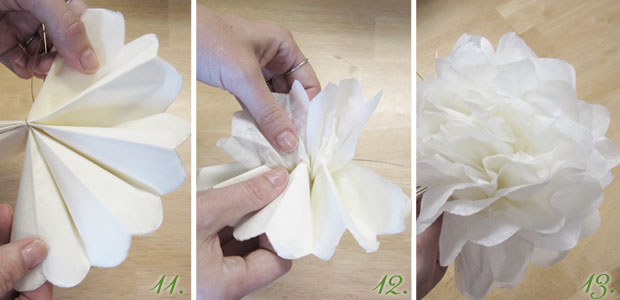
11. Fan out your tissue.
12. Gently begin pulling apart each layer, one by one.
13. Your tissue flower will start to take shape right away. Repeat on the other side and you’re done! Remember to attach two together (with their wire stems) to create a fully round tissue pom.
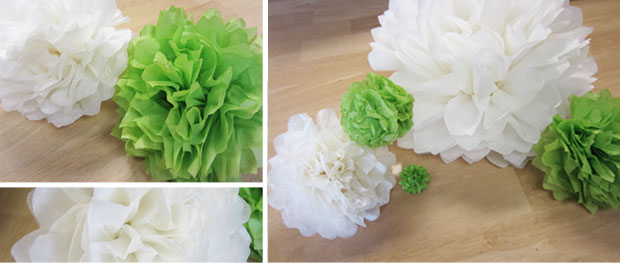
Once you have these lovely tissue flowers made, you can attach them anywhere! We’ve scattered ours around the studio.
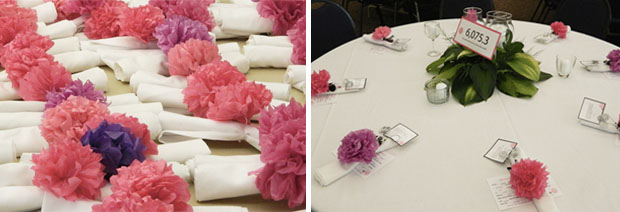
Monica shared these photos of the flowers she helped her sister, Beth, make for her wedding earlier this year. They placed them on top of each and every napkin! Where will you display yours?


